Prerequisites
Before creating a checkout link offer, make sure Game Redirect Login is set up.If you’re using the legacy JWT authentication method, see the dedicated article for setup instructions.
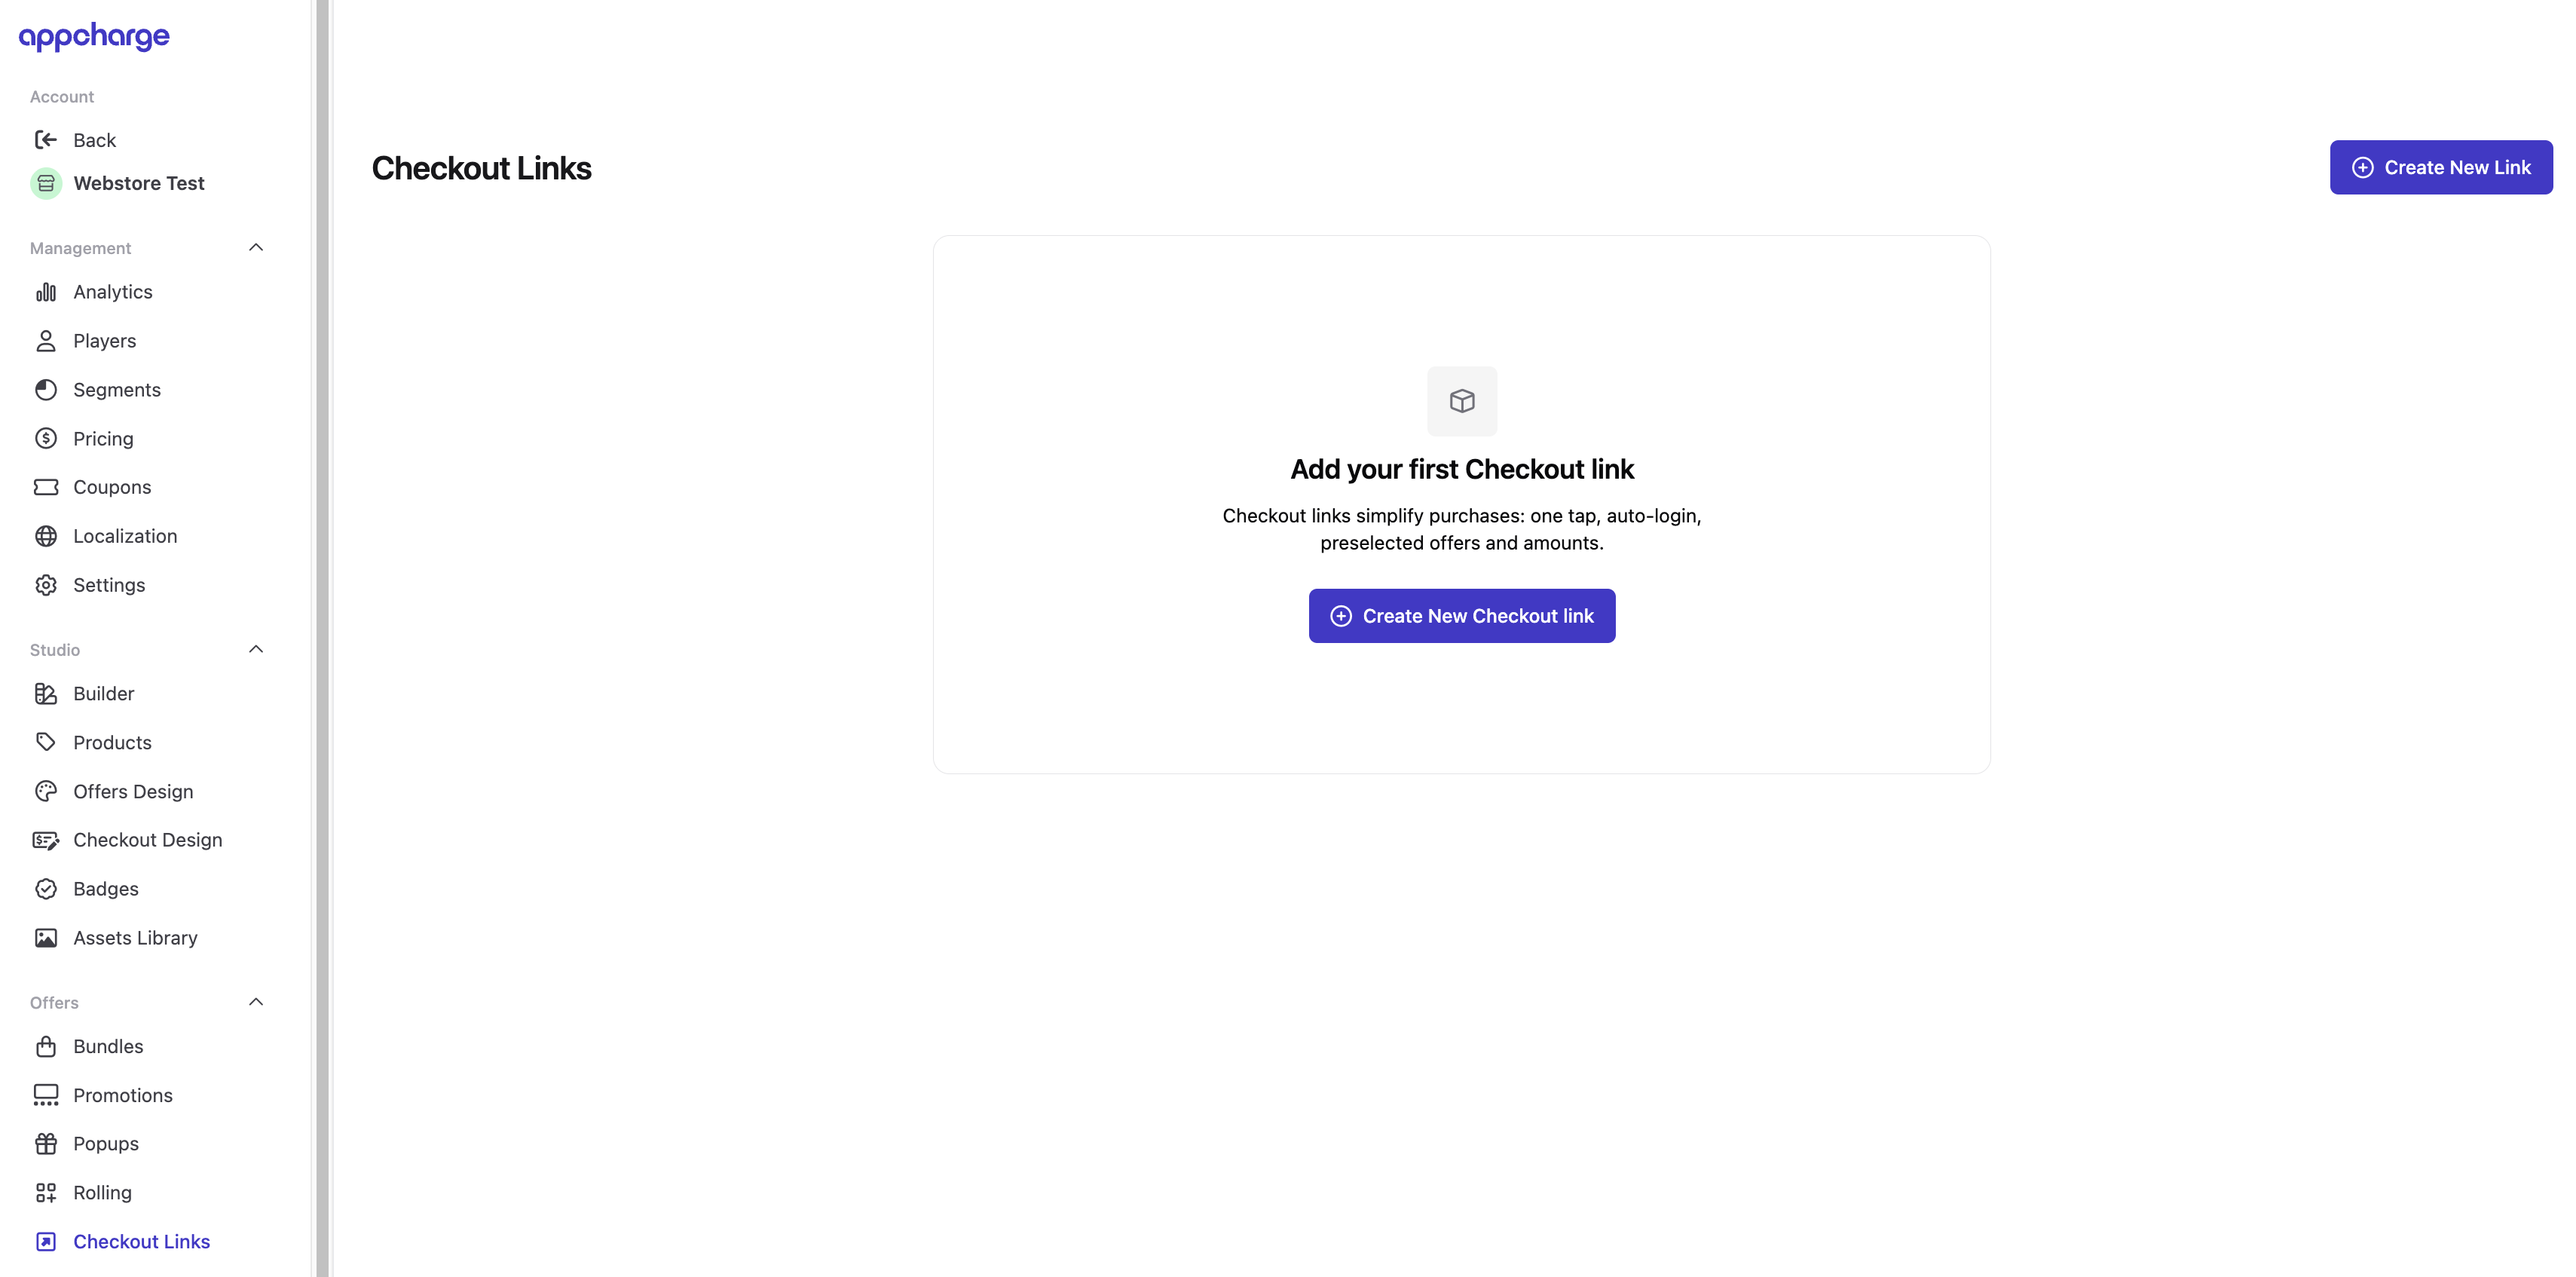
Create a checkout link offer
To create a checkout link offer:-
Go to Offers > Checkout Links and click Create New Link.
- In the Settings tab, provide the offer details, including price, products, and quantity.
-
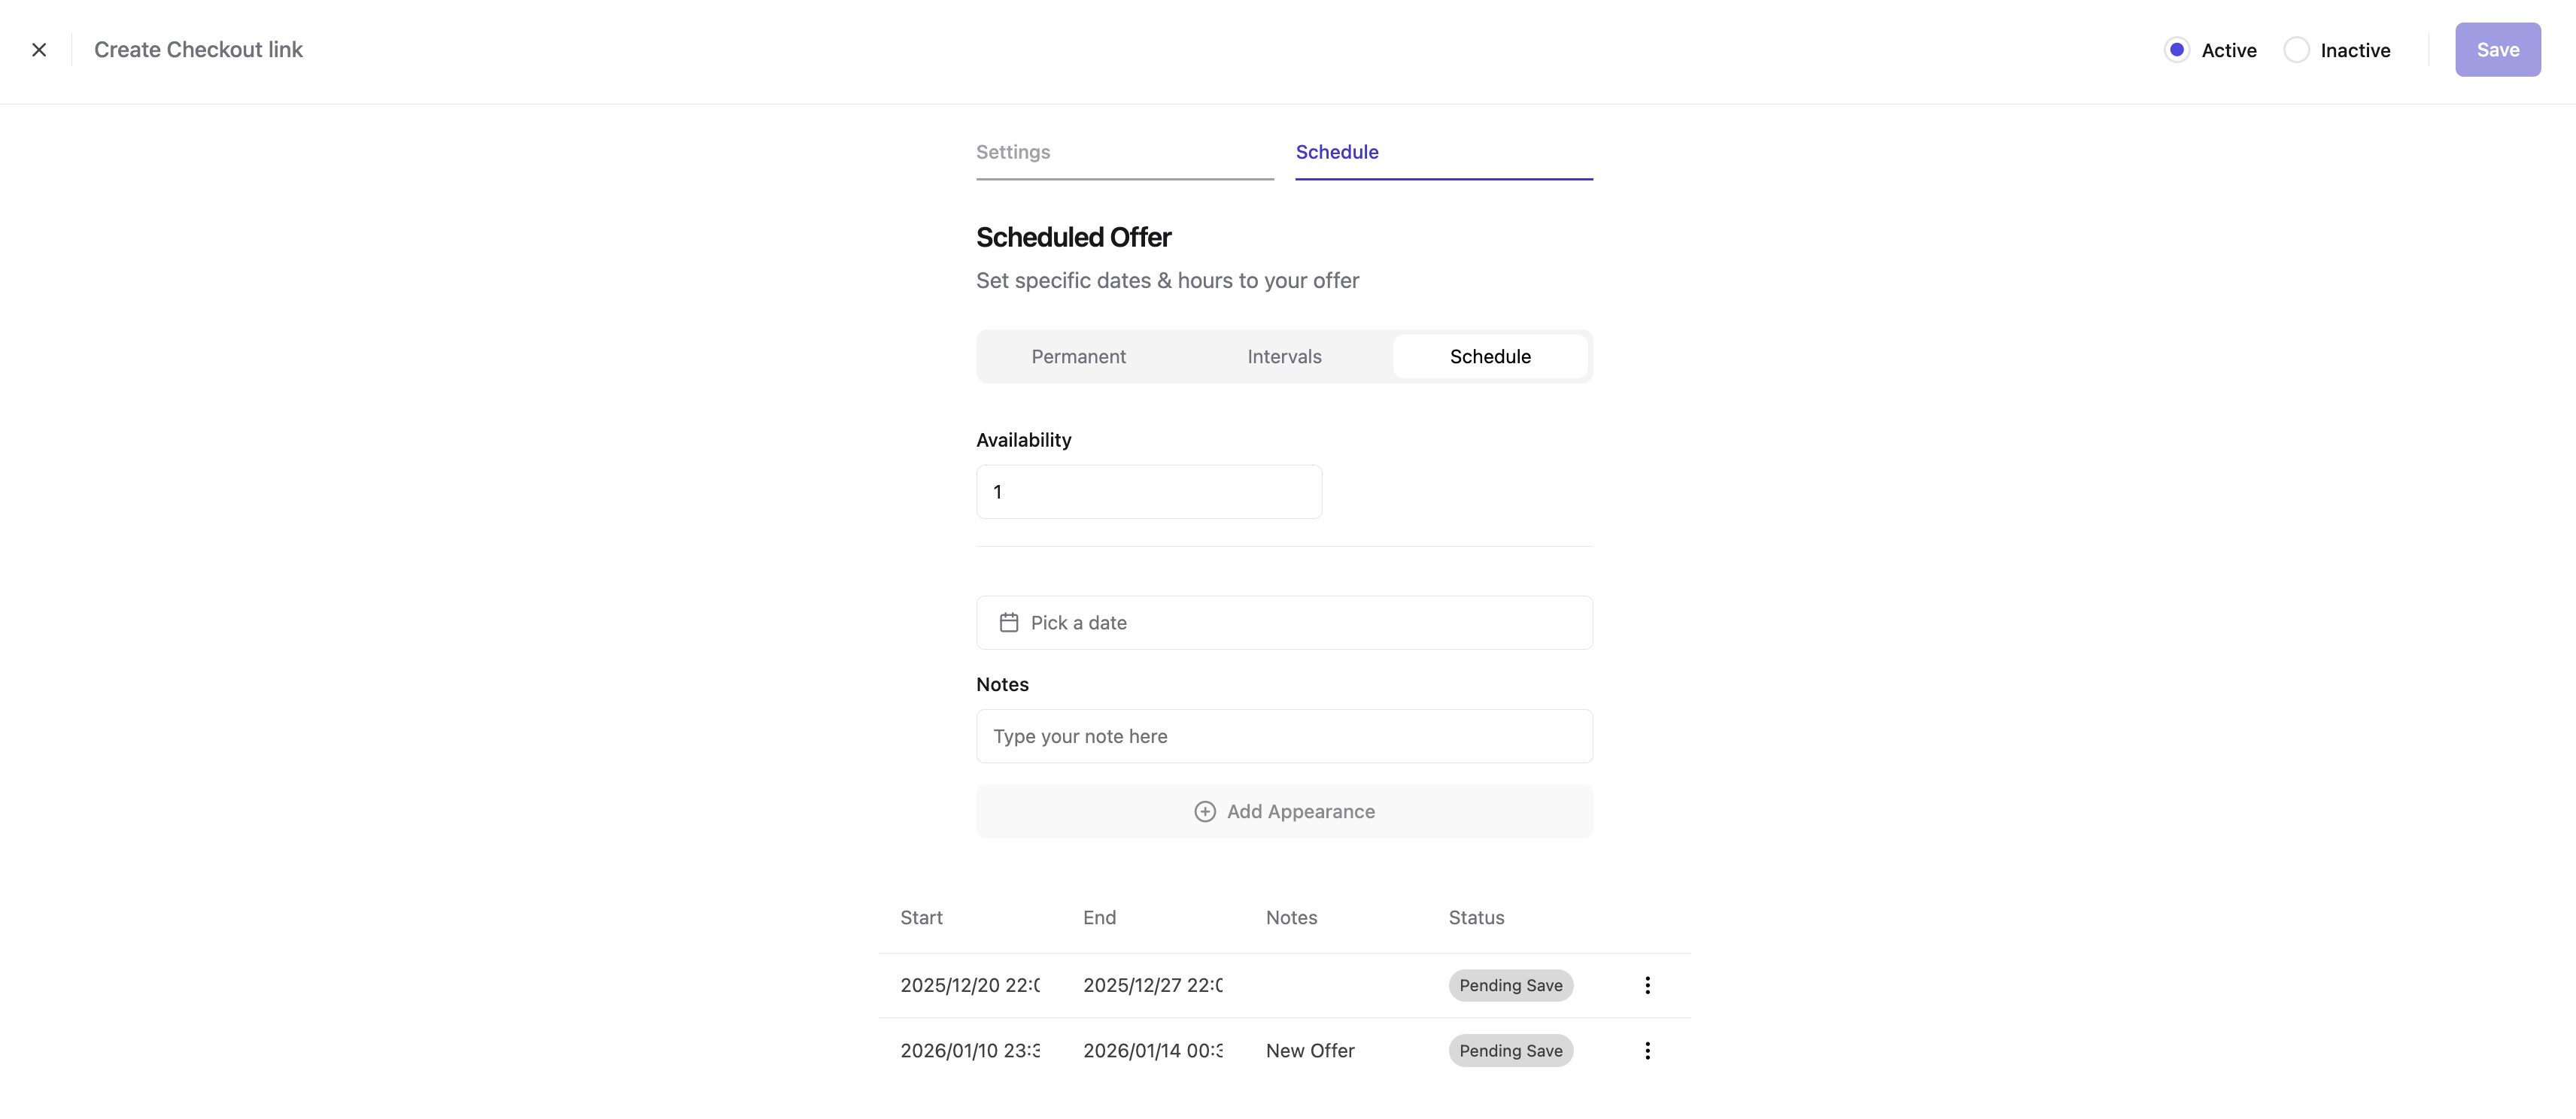
Go to the Schedule tab to manage when the checkout link offer is available and how often it can be purchased by each player. You’ll find three scheduling options:
- Permanent: The offer is always available, but you can limit how many times each player can purchase it.
- Intervals: The offer will appear according to the set time intervals. If the offer link is opened outside these intervals, it will not be available, and the player will have the option to return to the web store or game.
- Schedule: The offer will be available for purchase in specific quantities only during the time frames you define. If the offer link is opened outside these time periods, it will be unavailable, and the player will have the option to return to the web store or the game.
- Once you’ve filled in the necessary information, click Save to create the deeplink.
-
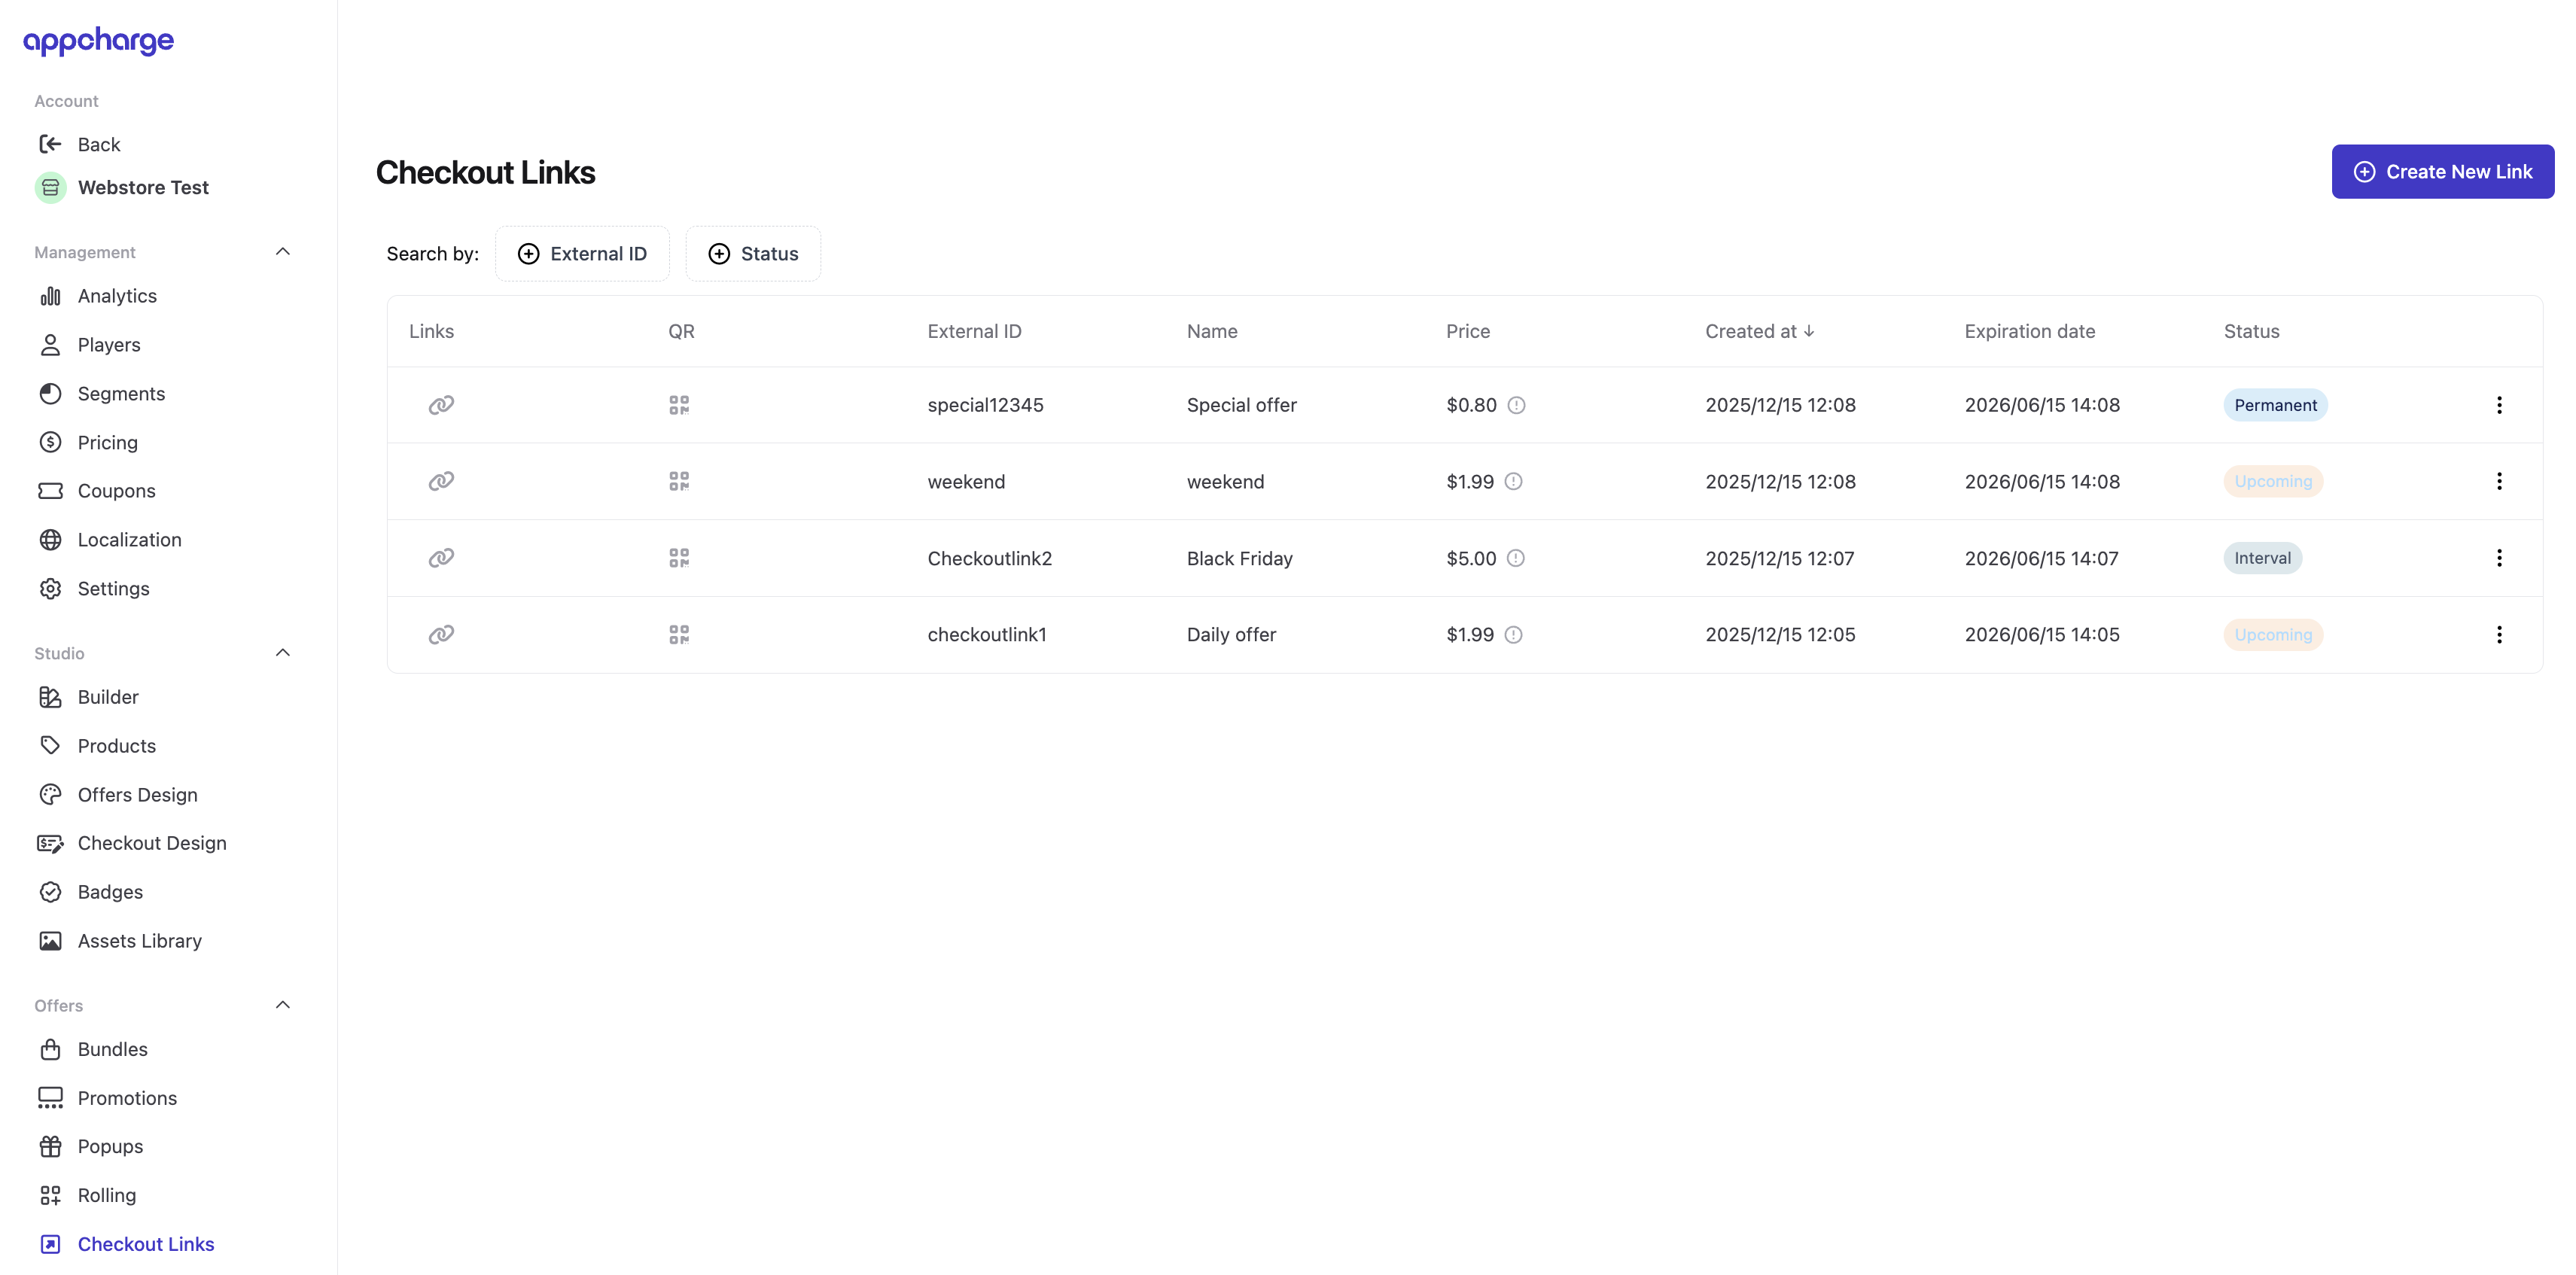
Return to the Checkout Links page and choose how you want to share the offer with players:
- Click on the link icon to copy the deeplink to your clipboard.
- Click the QR code image to download the QR code to your computer.
-
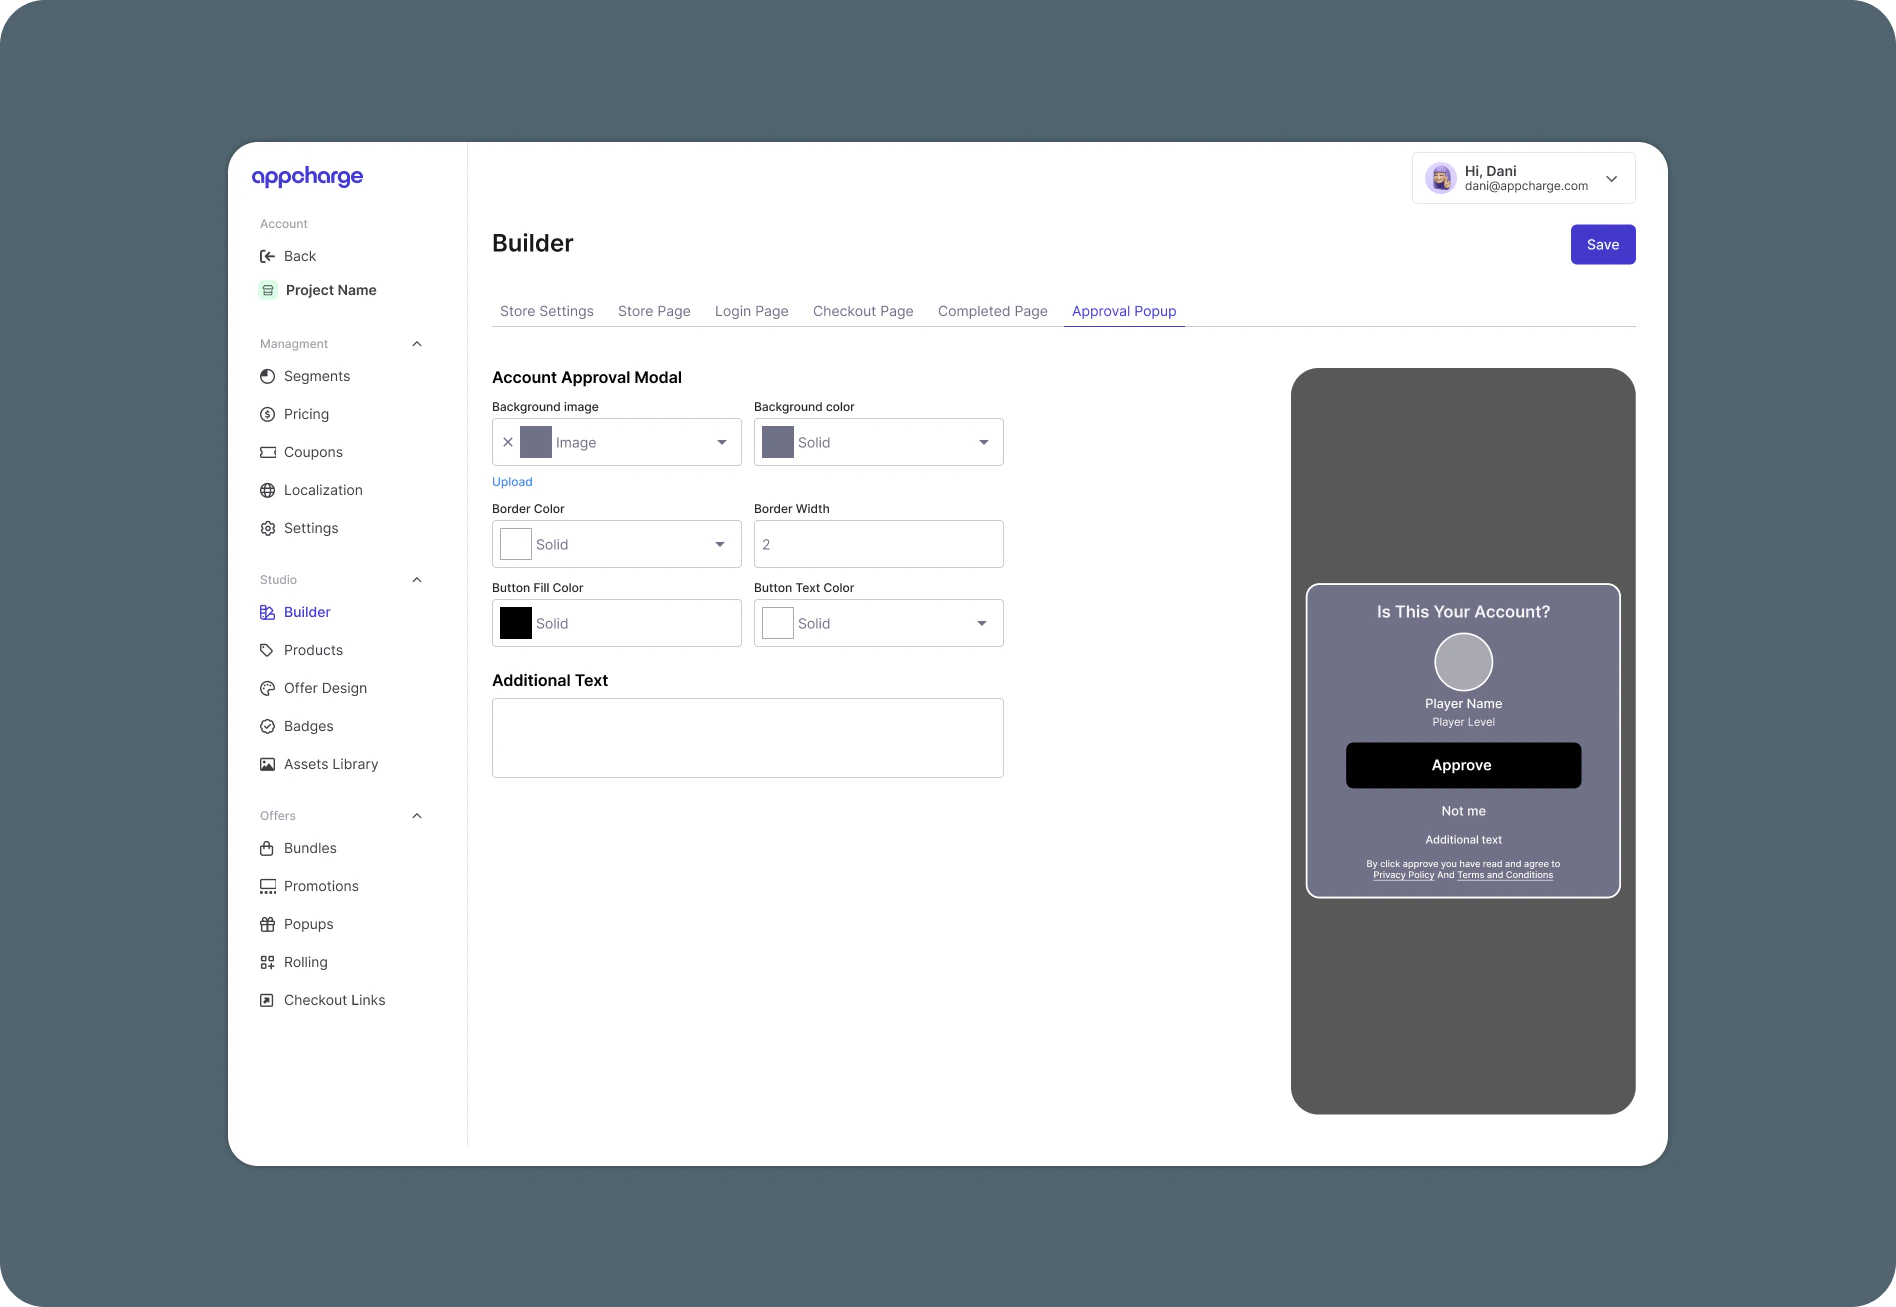
If you’d like to customize the approval request, go to the Approval Request tab in the Builder tab. If you choose not to customize the popup, the default Appcharge configuration is displayed.The following step is only relevant if you’re using the legacy JWT method.
Edit a checkout link offer
To edit an existing checkout link offer:- Go to the Checkout Links tab.
- Click the ellipsis next to the link you want to edit, then click Edit.
- Modify the checkout link as necessary. For example, update the price or change the schedule.
- Click Save to apply the changes.
Activate or deactivate a checkout link offer
To activate or deactivate a checkout link offer:- Go to the Checkout Links tab.
-
Click the ellipsis next to the link you want to activate or deactivate, and then click Activate or Deactivate.
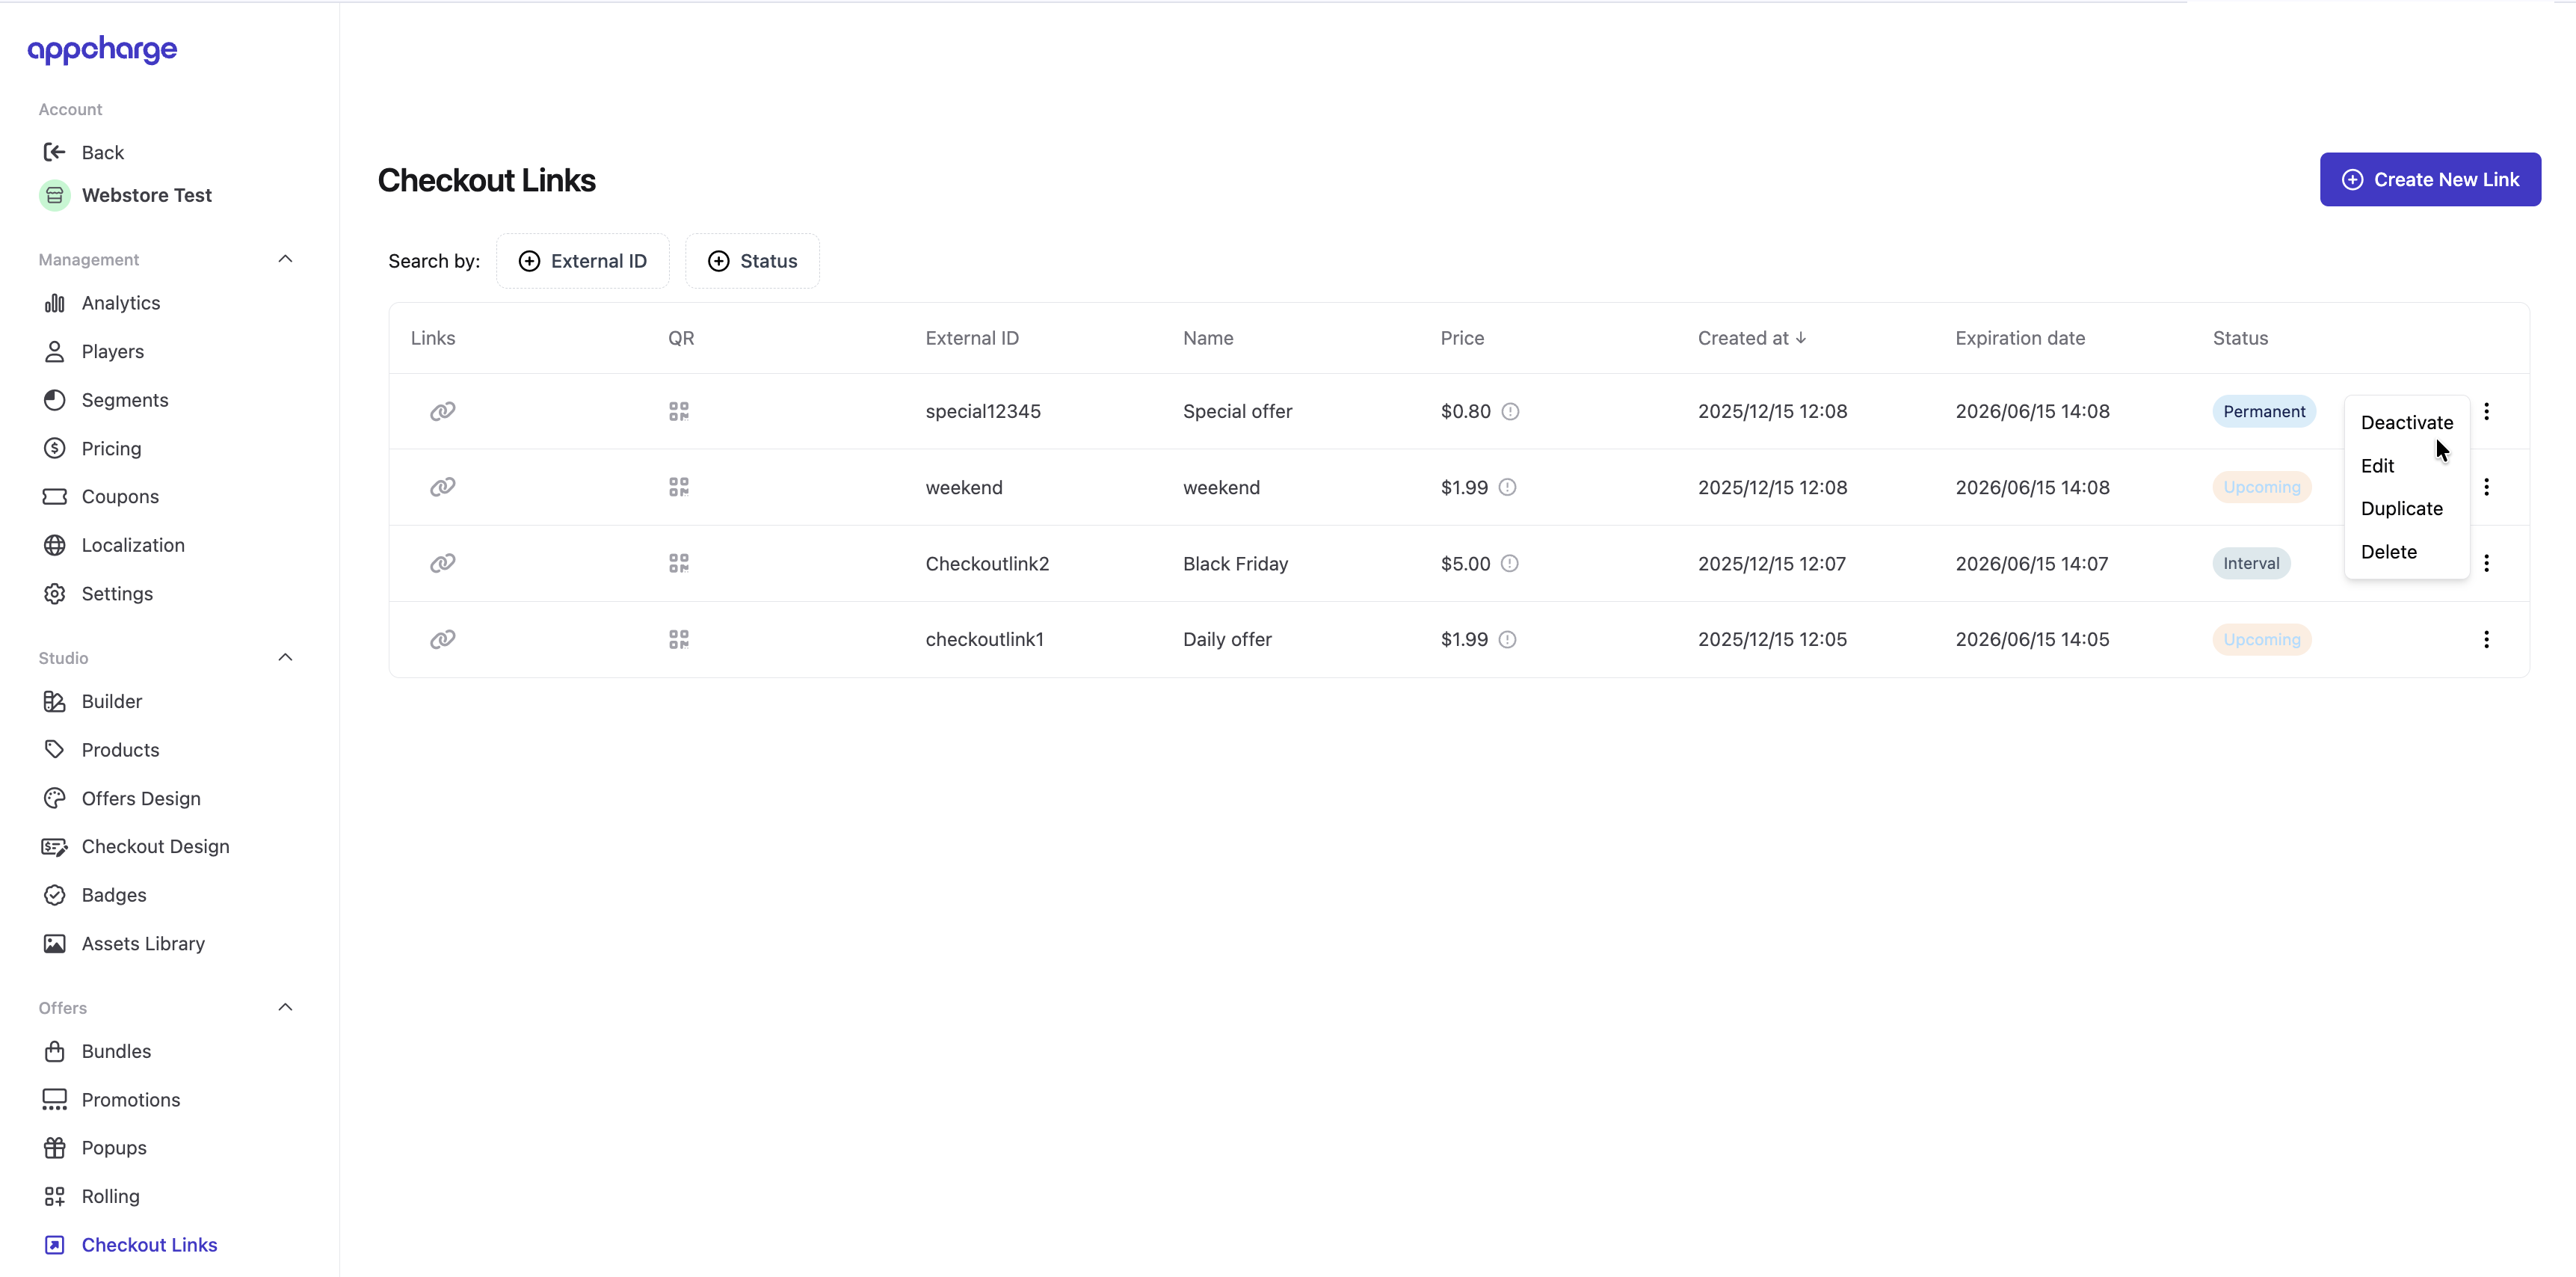
Delete a checkout link offer
To permanently delete a checkout link offer:- Go to the Checkout Links tab.
- Click the ellipsis next to the link you want to delete, and then click Delete.