
-
Go to the Build Settings window and make sure your Unity project is set to Android. Once set, the
AppchargeConfigfile updates to display Android-specific configuration options.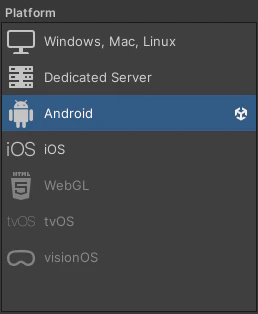
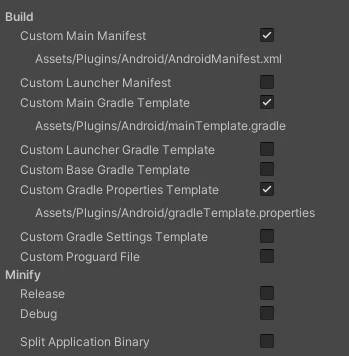
- Click Player Settings > Publisher Settings, and scroll to the Build section.
-
Expose (enable) the following android plugin files or the build process will be passed without changes:
- Custom Main Manifest (
AndroidManifest.xml) - Custom Main Gradle Template (
mainTemplate.gradle) - Custom Gradle Properties Template (
gradleTemplate.properties)
- Custom Main Manifest (
-
Your configuration settings should look like this:
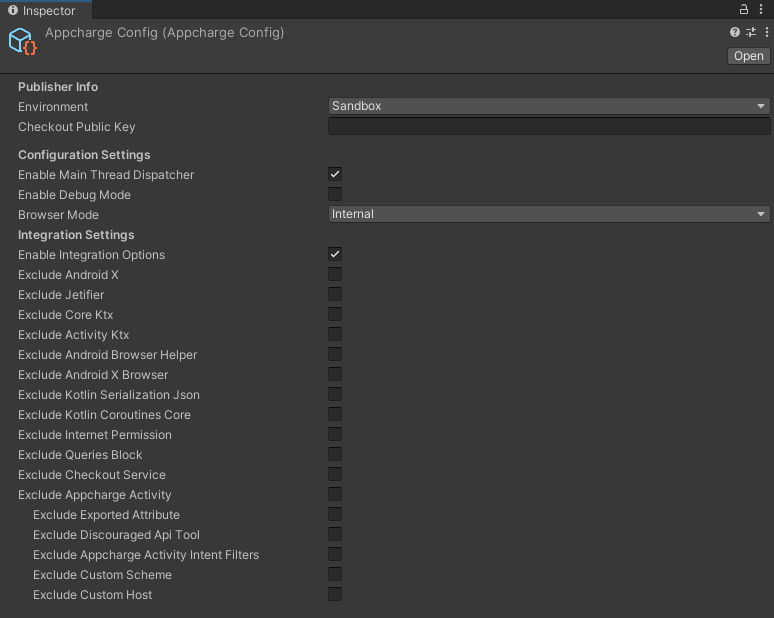
Publisher Info
These settings can also be changed at runtime, but doing so requires re-initializing the SDK.Configuration Settings
Integration Settings
Enables automatic integration of required Android dependencies and manifest entries during the build process.Exclude Appcharge Activity
By default, the SDK adds the Appcharge Checkout activity, its exported attribute, and the deeplink intent filter toAndroidManifest.xml. Use the options below to skip parts of that setup if you manage them in your own manifest.- If Exclude Checkout Service isn’t checked, the SDK automatically adds the required permissions and the
CheckoutServicedeclaration to your manifest file without duplicating existing permissions. If Exclude Checkout Service is checked, the SDK doesn’t modify your manifest file. - If you’re upgrading an existing integration that already includes the
CheckoutServicedeclaration, updateandroid:foregroundServiceTypefromdataSynctoshortServicein your manifest.
Example Manifest
If the options above are not excluded (disabled), your final Manifest will look like this: - If Exclude Checkout Service isn’t checked, the SDK automatically adds the required permissions and the
Unity
Integrate with Android
This article explains how to integrate Unity Payment Links with the Android platform.
To integrate with Android:
Was this page helpful?