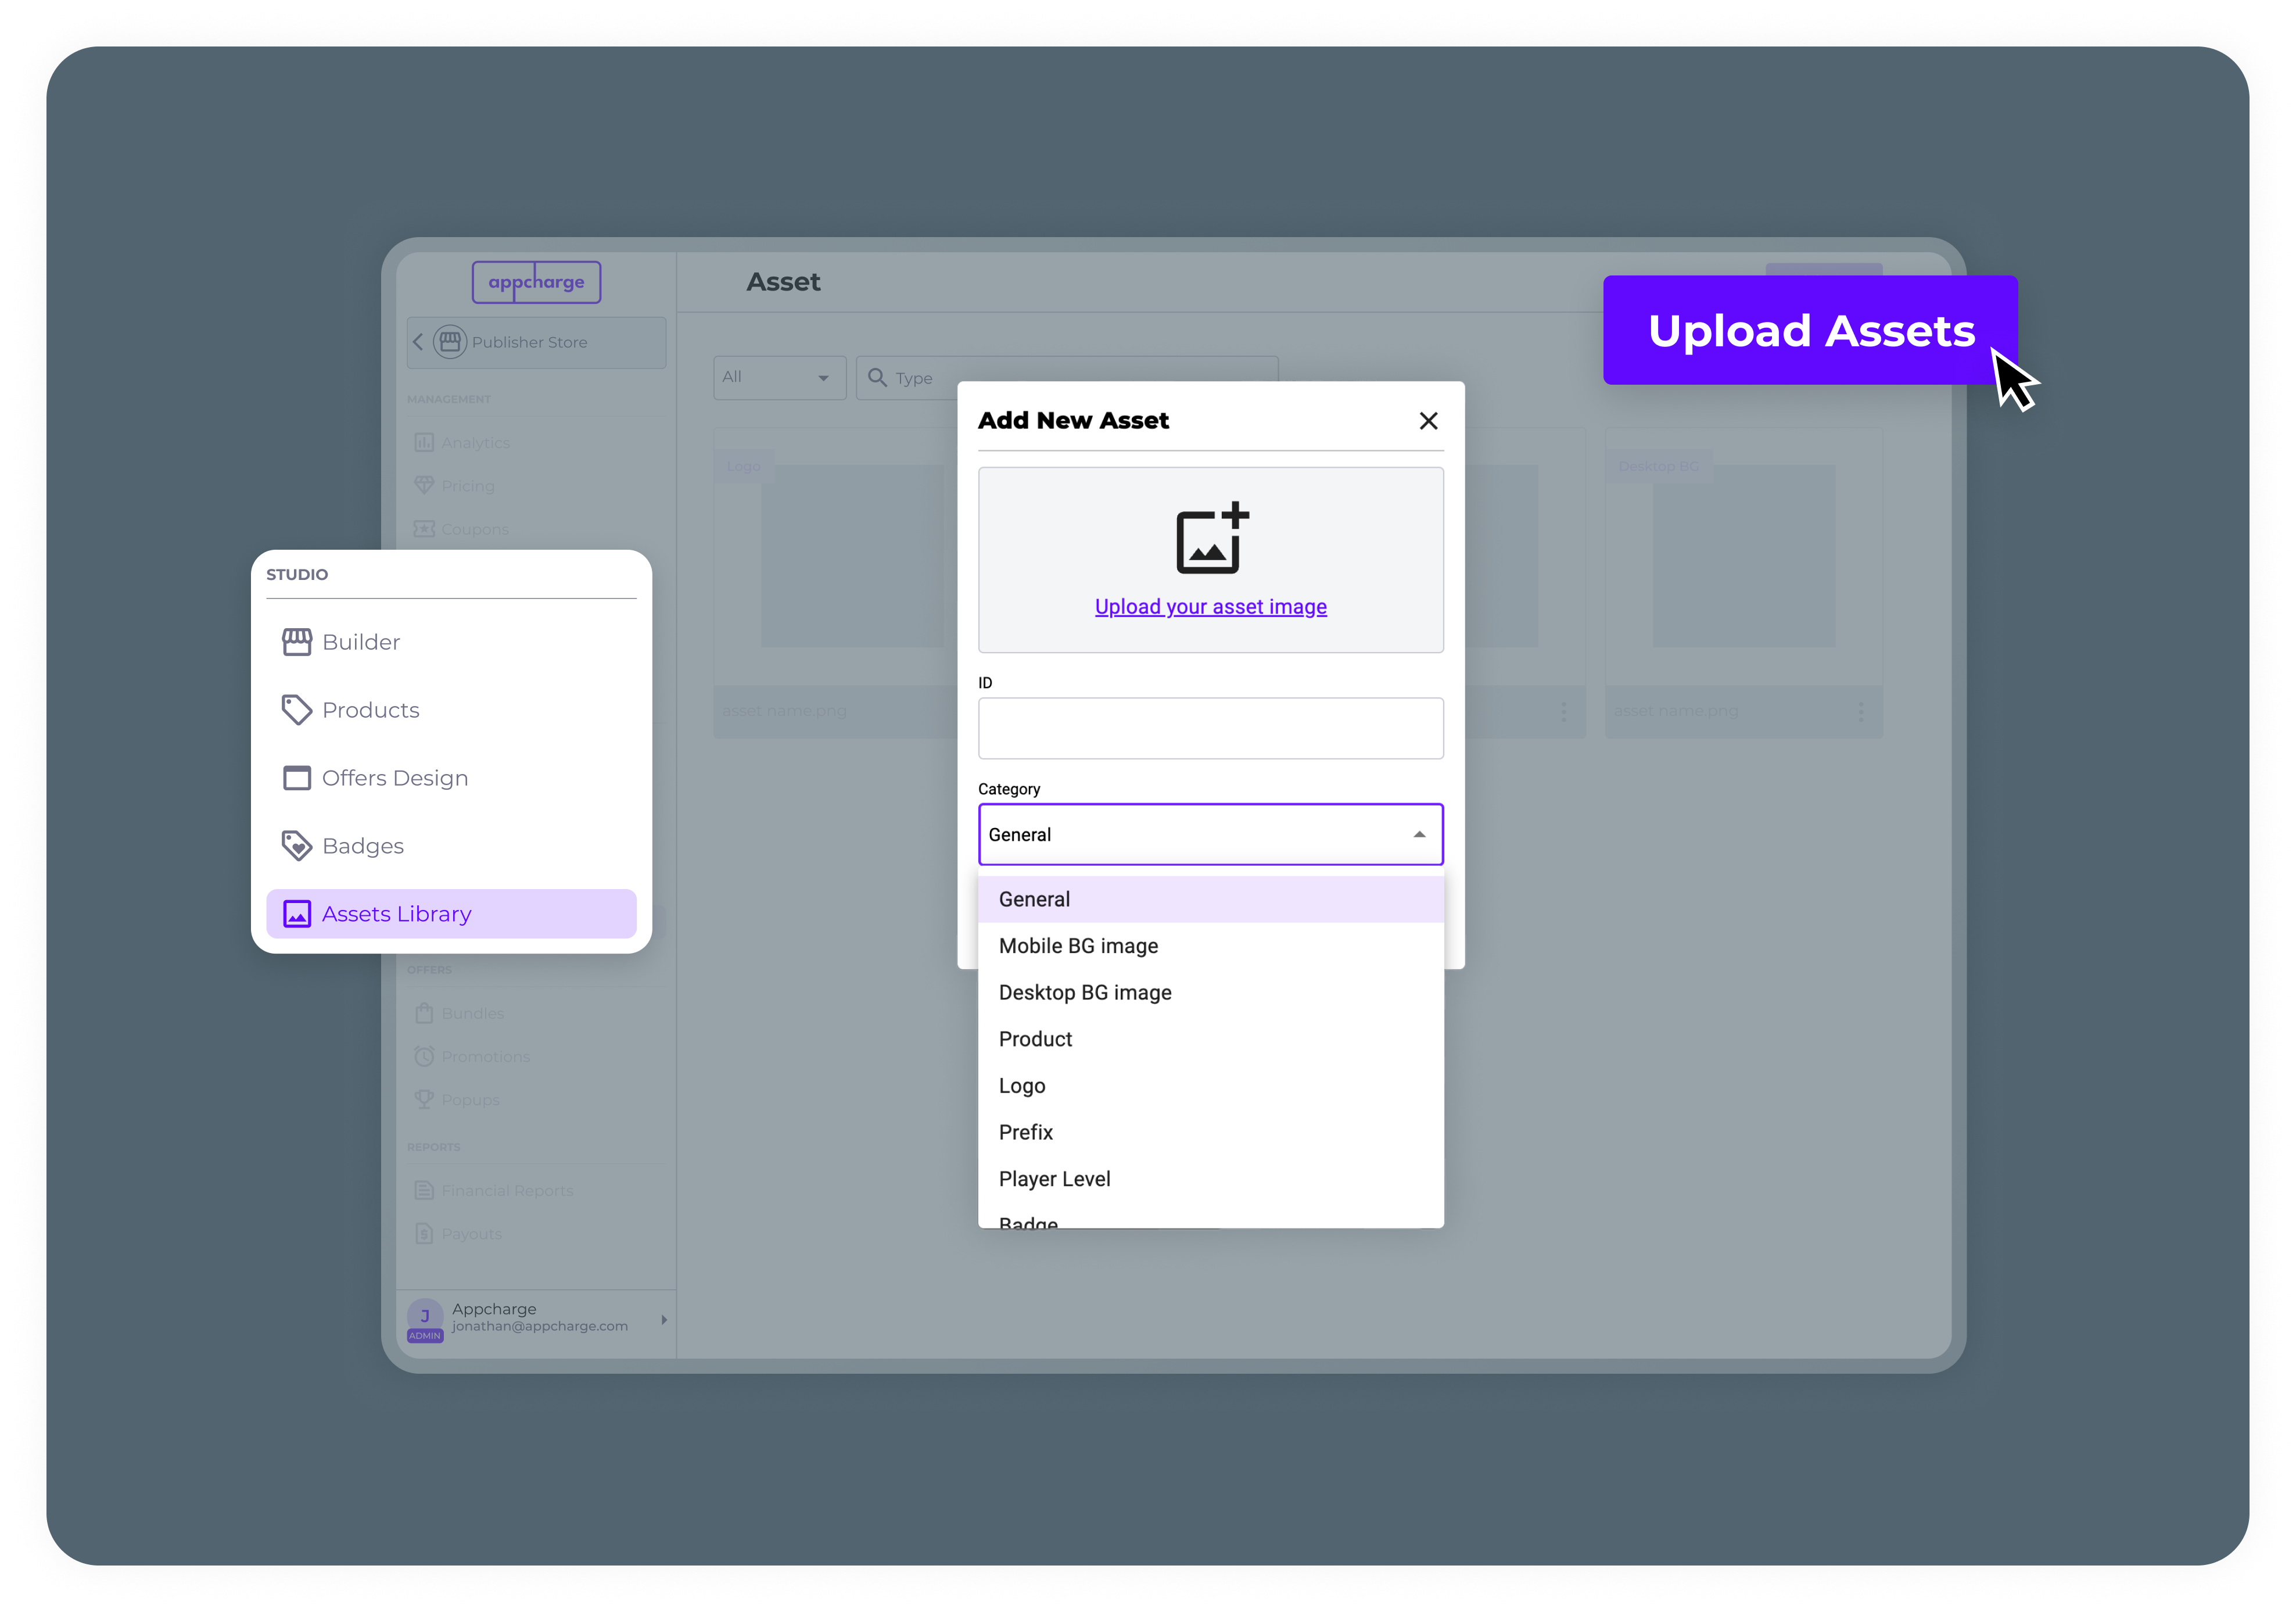
The Assets Library stores all the visual files for your project. Each project in your account has its own library, where you can create and manage assets to use across the project. This ensures everyone working on the project has access to the relevant files, improving efficiency and consistency. You can also create and manage assets in the Assets Library using the Assets API.

Add an asset

To add an asset:
  1. Go to the Assets Library tab and click Upload Asset.
  2. Click Upload your asset image to select an image from your files.
  3. In the ID field, enter a unique identifier for the asset.
    Note: You will need this ID when configuring elements such as products and offers in your web store.
  4. In the Category field, select the asset type. Note that the asset will only be available for use in the category you select. For example, an asset set to Product can only be used when configuring products.

Asset upload requirements

To ensure your assets display correctly across your web store, refer to the specifications in the table below for each asset category. These requirements may vary slightly depending on your web store template.
CategoryDimensionsFile TypeMinimum Width
Mobile BG Image1:3PNG or JPEG400 px
Desktop BG Image1920 × 1080 pxPNG or JPEG1920 px
Product1:1PNG or JPEG128 px
Logo1:1PNG or JPEG320 px
Prefix1:1PNG or JPEG32 px
Player Level3:1PNG or JPEG800 px
Badge (Emblem)1:1PNG or JPEG128 px
Badge (Prefix)1:1PNG or JPEG32 px
BG Bundle (1 in a Row)2:1PNG or JPEG400 px
BG Bundle (2 in a Row)1:1PNG or JPEG400 px
BG Bundle (3 in a Row)2:1PNG or JPEG400 px
BG Popup (Square)1:1PNG or JPEG400 px
BG Popup (Vertical)2:3PNG or JPEG400 px
Banner3:1PNG or JPEG800 px
Offer Header1:1PNG or JPEG32 px
Favicon1:1PNG or JPEG32 px
Section1:1PNG or JPEG32 px
Button Image1:1PNG or JPEG32 px
Icon Image1:1PNG or JPEG32 px
Player Profile Image1:1PNG or JPEG128 px
Back To Game Buttonn/aPNG or JPEG48 px