- Left Sidebar: Manage the Blocks that make up your store layout.
- Center Panel: Preview your web store in real time.
- Right Sidebar: Apply global branding and style settings using the Brand Kit.
- Top Bar: Access template tools and preview options.
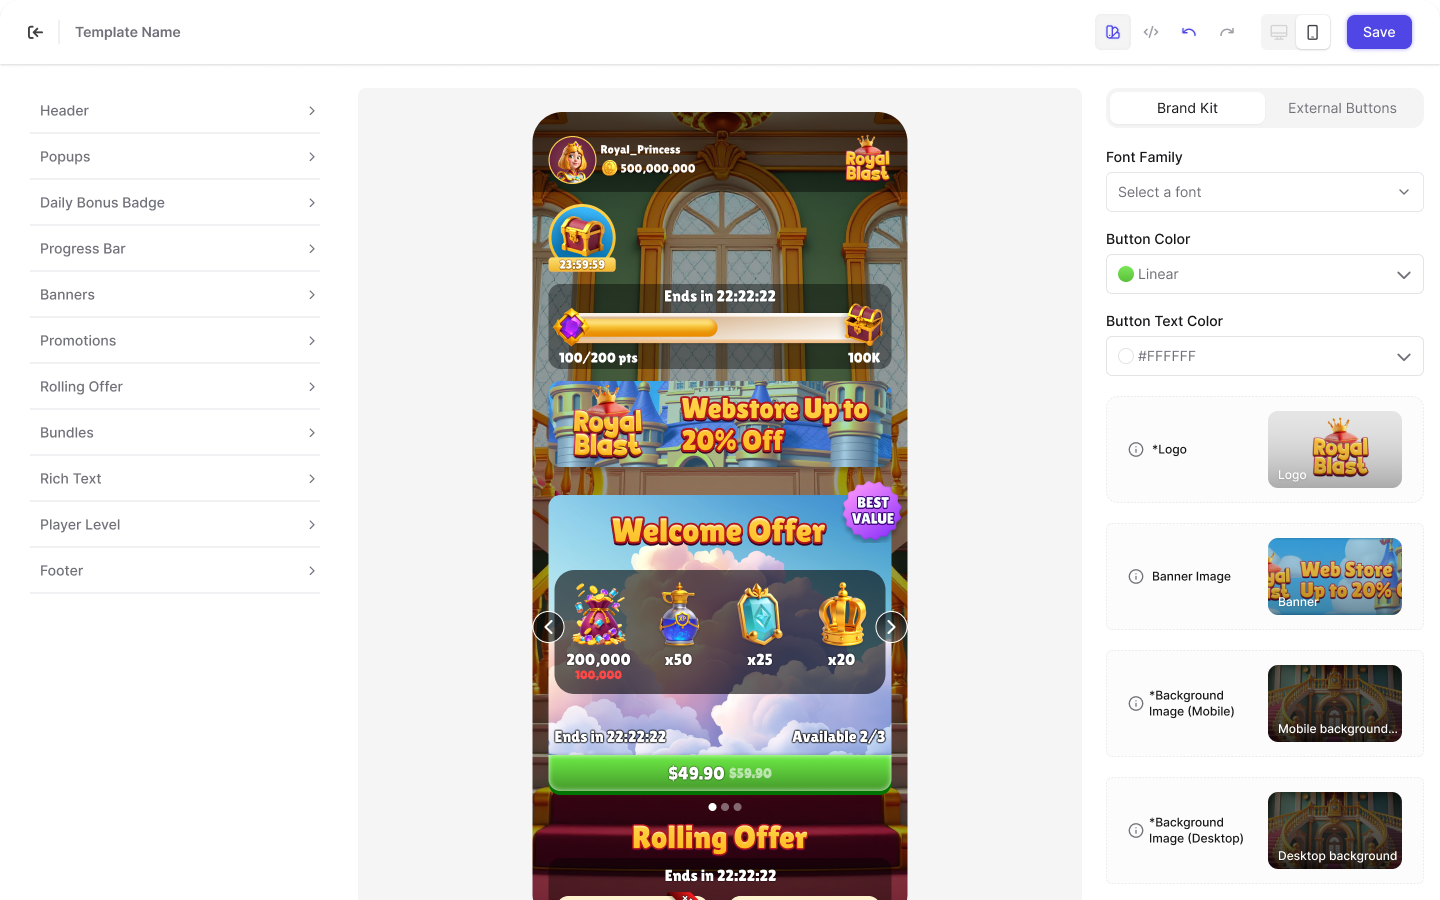
Left Sidebar
The Left Sidebar displays the list of pre-configured Blocks that define the structure and layout of your web store. Each Block represents a section of the store, such as the header, bundles, banners, or footer, and includes settings specific to that section. From the Left Sidebar, you can:- Hide or show Blocks to control which sections appear in the store.
- Configure Blocks to control how a section is displayed in the store.
- Reorder Blocks to change where a section appears in the page layout.
Center Panel
The Center Panel shows a live preview of your web store. As you make changes in the Template Editor, the preview updates automatically so you can see how your store will look before saving or activating. By default, the preview displays the web store as it would appear on a mobile device. You can switch between mobile and desktop views using the controls in the Top Bar.Right Sidebar
The Right Sidebar contains the Brand Kit, where you configure global design and style settings for the template. While you can’t modify the internal structure of layouts, such as text position, or card spacing, the Brand Kit allows you to apply consistent branding across your entire store, including:- Fonts
- Button colors
- Logos
- Background images
- Footer images
- Branding: Global design settings for the template.
- External Buttons: Style settings for optional buttons such as Back to Game and Add to Home Screen.
Top Bar
The Top Bar runs across the top of the Template Editor and provides tools for managing your template. From the Top Bar, you can:- Rename the template.
- Preview the store on mobile or desktop.
- Undo or redo changes made while editing.
- Open the Brand Kit.
- Test personalization responses.
- Save your changes.
- Go back to the list of templates.
Rename the template
To edit the template name:- Hover over the template name.
- Click the Edit icon.
- Enter a new name and press Enter.